Friday, July 17, 2015

An overview of ReactJS with JSX for dynamic UI generation

The last couple of weeks that passed by was a hell of a busy time with so many submissions, assignments and evaluations at the university. Yet one very interesting happened on the 3rd of July.
"Yaaay! I passed the mid evaluations!!!"
I am glad I got through it some how. The work that was assigned to be completed before the mid term evaluations was to complete the unified search and browse functionality for a single entity. What I chose was 'Artist'. My mentor wanted to see some outcome in the working state even if all the details aren't looked into. So I focused and narrowed my work to the fields Type, Gender and Tag.

Since I could not mention about ReactJS in any of the previous posts here it goes...



Apparently what I used for the UI generation of this interface was ReactJS. I had never heard of React any time before I started working on this interface but luckily I could get hold of its concepts within almost a week.

ReactJS basically allows one to look at and organize a web interface in a sense of components that are arranged in a hierarchical manner. The key powerful thing it provides is the ability to incorporate a state to each of those components so that a dynamic change to the web interface is made as simple as setting the value of some variable in JavaScript. A change to the state of the component automatically triggers the UI of the component to be refreshed and re rendered. Changes to the state may happen in many possible ways including an action from the user. This action in almost all the cases can be considered as an event.

Another interesting thing I came across with ReactJS is JSX. JSX is basically an object oriented programming language that can be used with React to create that component hierarchy I mentioned earlier about. The JSX syntax basically resembles that of XML and makes it pretty easy to understand what that code does with the UI. Say we have a React component named 'Results' and the tag
<Results />
will magically output what ever HTML or JSX that was specified in the render method of that particular component. This ought to give you some idea on how the hierarchy happens too. If it was some JSX tags that were specified in the render method, what we have is a nested component inside another component. The following example will help with any confusions.

var DateInput = React.createClass({
  render: function () {
    return (
      <div>
        <span className="partial-date">
          <input maxLength="4" placeholder='YYYY' size="4" className="partial-date-year" />
          -
          <input maxLength="2" placeholder='MM' size="2" className="partial-date-month" />
          -
          <input maxLength="2" placeholder='DD' size="2" className="partial-date-day" />
        </span>
      </div>
    );
  }
});

var ValidString = React.createClass({
  render: function () {
    return (
      <div><span>'Please enter a valid input.'</span></div>
    );
  }
});

var DateRangeField = React.createClass({
  render: function () {
    return (
      <div>
        <h3>From</h3>
        <DateInput />
        <h3>To</h3>
        <DateInput />
        <ValidString />
      </div>
    );
  }
});


As shown above each react component will have its own render function which specifies its contribution to the UI. Above 3 classes are the simplest form where none of them have any state incorporated to them. What I intended on emphasizing here is the fact that the components DateInput and ValidString are enclosed in the DateRangeField and
React.render(DateRangeField, document.getElementById("content"));
would render the built hierarchy into HTML as follows.

<div>
  <h3>From</h3>
  <div>
    <span className="partial-date">
      <input maxLength="4" placeholder='YYYY' size="4" className="partial-date-year" />
      -
      <input maxLength="2" placeholder='MM' size="2" className="partial-date-month" />
      -
      <input maxLength="2" placeholder='DD' size="2" className="partial-date-day" />
    </span>
  </div>
  <h3>To</h3>
  <div>
    <span className="partial-date">
      <input maxLength="4" placeholder='YYYY' size="4" className="partial-date-year" />
      -
      <input maxLength="2" placeholder='MM' size="2" className="partial-date-month" />
      -
      <input maxLength="2" placeholder='DD' size="2" className="partial-date-day" />
    </span>
  </div>
  <div><span>'Please enter a valid input.'</span></div>
</div>


The following component demonstrate the use of function call backs on event triggers.

var SearchBox = React.createClass({
  handleTextInput: function (event) {
    if (event.keyCode === 13) {
      var input = event.target.value;
      console.log(input);
    }
  },

  render: function () {
    return (
      <input id="search-box" type="text" onKeyDown={this.handleTextInput} />
    );
  }
});


the onKeyDown={this.handleTextInput} property specied in the input tag tells React to execute the handleTextInput method defined above it when ever a keydown event fires. The SyntheticEvent object that corresponds to the event that occurred will automatically be passed into the function when it is being called without the user explicitly needing to specify it.

The following component I have built demonstrates the use of the state of a component to decide whether a part of its render method HTML code needs to be visible on the UI or not.

var Panel = React.createClass({
  getInitialState: function () {
    return {collapseState: false};
  },

  handleTitleClick: function (event) {
    event.preventDefault();
    this.setState({collapseState: !this.state.collapseState});
  },

  render: function () {
    return (
      <div>
        <div className="panel-heading" id="headingOne">
          <div className="panel-title">
            <a href="#" id={"title-artist"} onClick={this.handleTitleClick}>
              Artist
            </a>
          </div>
        </div>
        {this.state.collapseState &&
          <div id={"collapse-artist"} className="panel-collapse" >
            Visible/ Invisible Artist Content
          </div>
        }
      </div>
    );
  }
});

Using the '&&' operator is a simpler way of saying 'display the one after it only when the expression prior to it evaluates to true'. So what this component basically does is clicking on the <a> hyperlink would fire the event flipping the value of the state variable collapseState there by toggling the visibility of the "collapse-artist" div.

Another useful feature in React is the ability to pass properties to the child components in the hierarchy when they are specified in JSX. For example say there is a component named Content. When we specify that component using JSX anywhere, we have the ability to pass it any properties of any types we like.
<Content property1="This is property string" property2={prop: "This is property ob"} /> All these property values can be accessed inside the Content component simply by referring them as
this.props.property1 which will return the string and this.props.property2 which will return the object.

This is some basic overview on what ReactJS can do. The React documentation has all these plus many more other things looked much deeper into depth. One thing is for sure... I am in love with ReactJS!
Sunday, June 7, 2015

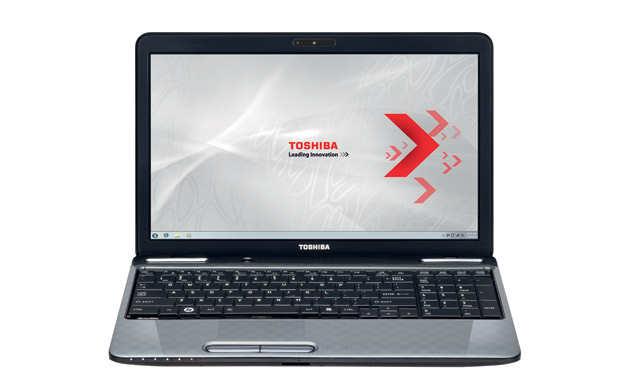
Brightness adjustment failure in Toshiba Satellite L755 in Ubuntu 12.04 LTS -- Fixed!

This is a hack I came across in Ubuntu some time ago but just felt that it would be worth sharing.

I am having a Toshiba Satellite L755 laptop and I always came across some issues or incompatibilities when ever I installed Ubuntu in it. Most of them were related with the graphic card I'm having which is the NVIDIA® GeForce® GT 525M. So the most excruciating experience I had from those issues was the inability to change the screen brightness. The usual brightness adjustment keyboard key combinations do not work and the brightness slider in System Settings even did not have any effect when changed. This almost made it unable for me to work in Ubuntu because I started getting headaches due to the unbearable brightness of the screen.


After ages of searching on the internet I finally found a neat solution. The first step is to run this command in a terminal

xrandr -q | grep " connected"


The result of the above command in my machine is

LVDS-0 connected 1366x768+0+0 (normal left inverted right x axis y axis) 344mm x 194mm

and should not necessarily be equal to what someone else would get. The important information that should be reaped from the above result is the part that stands for the display, which is in my case LVDS-0.

All that is needed to be done next is run the command

xrandr --output LVDS-0 --brightness 0.5

in the terminal where the highlighted part in yellow should be the piece information you got from the previous command which again in my case is LVDS-0.
The value 0.5 represents the amount the screen should be dimmed and can be given any value from 0 to 1.

I hope this would help someone having the same problem.

Categories/Entities to be displayed for browsing the MusicBrainz database


Just as I have displayed in the prototype I made for this project, I need to clearly identify the exact set of core entities that I would allow the browsing facility on the interface I design and the set of sub categories each of those entities would provide. Since the prototype was done basically for demonstration purposes, it contains the fore mentioned information regarding Artists and Release Groups only. Shown below is how I plan on categorizing all the available entities and sub categories for the browse interface with reference to the facilities made available by the MusicBrainz XML Web Service.

Artists

  • Type
    • Person
    • Group
    • Other
  • Gender
    • Male
    • Female
    • Other
  • Country
    • A search box to select the country
  • Born/Founded
    • From
    • To
  • Died/Dissolved
    • From
    • To
  • Tags
    • Electronic
    • Jazz
    • Pop
    • Classical
    • Any other user specified tag
Release Groups
  • Primary Type
    • Album
    • Single
    • Ep
    • Other
  • Secondary Type
    • Audiobook
    • Compilation
    • Interview
    • Live
    • Remix
    • Spoken Word
    • Soundtrack
  • Number of Releases
  • Contains Release
    • User specified name of a release that appears in a Release Group
  • Tags
    • Electronic
    • Jazz
    • Pop
    • Classical
    • Any other user specified tag
  • Status
    • Official
    • Promotional
    • Bootleg
    • Pseudo-release
Releases

  • Country
    • A search box to select the country
  • Date
    • From
    • To
  • Format
    • Compact Disc
      • DTS-CD
      • Data CD
      • Enhanced CD
      • HDCD
      • CD-R
      • 8cm CD
      • Blu-spec CD
      • SHM-CD
      • HQCD
      • CD+G
    • Vinyl
      • 7" Vinyl
      • 10" Vinyl
      • 12" Vinyl
    • Cassette
    • DVD
      • DVD-Audio
      • DVD-Video
    • SACD
      • Hybrid SACD
    • DualDisc
      • 8cm CD+G
    • MiniDis
    • Blu-ray
    • HD-DVD 
    • Videotape 
      • VHS 
      • Betamax 
    • VCD 
    • CDV 
      • SVCD 
    • UMD it
    • Other 
      • Cartridge  
      • Wax Cylinder 
      • USB flash drive 
      • LaserDisc 
      • Piano roll 
      • DAT 
      • Reel-to-Reel 
      • DCC 
      • slotMusic
    • Wire recording
    • Microcassette/Minicassette
    • 4 tracks/8 tracks/multitracks recording
    • Elcaset 
    • VinylDisc  
    • SD card  
    • Gramophone record
  • Label
    • User input field(eg: Torana)
  • Language
    • User specified field(Query accepts 3 letter words like eng or sin)
  • Mediums
    • User specified number of mediums in a release
  • Primary Type (of the RG)
    • Album
    • Single
    • Ep
    • Other
  • Secondary Type (of the RG)
    • Audiobook
    • Compilation
    • Interview
    • Live
    • Remix
    • Spoken Word
    • Soundtrack
  • Quality
    • Low
    • Normal
    • High
  • Script
    • User specified field(Query accepts 4 letter script codes as provided here)
  • Status
    • Official
    • Promotional
    • Bootleg
    • Pseudo-release
  • Tags
    • Electronic
    • Jazz
    • Pop
    • Classical
    • Any other user specified tag
  • Tracks(total number of tracks over all mediums on the release)
    • User specified field
CD Stub
  • Tracks(total number of tracks on the CD Stub)
Label
  • Type
    • Imprint
    • Original Production
    • Bootleg Production
    • Reissue Production
    • Distributor
    • Holding
    • Rights Society
  • Country
    • A search box to select the country
  • Founded
    • From
    • To
  • Ended
    • From
    • To
  • Tags
    • Electronic
    • Jazz
    • Pop
    • Classical
    • Any other user specified tag
Recording
  • Country
    • A search box to select the country
  • Released Date
    • From
    • To
  • Duration
    • Between
  • Format
    • Compact Disc
      • DTS-CD
      • Data CD
      • Enhanced CD
      • HDCD
      • CD-R
      • 8cm CD
      • Blu-spec CD
      • SHM-CD
      • HQCD
      • CD+G
    • Vinyl
      • 7" Vinyl
      • 10" Vinyl
      • 12" Vinyl
    • Cassette
    • DVD
      • DVD-Audio
      • DVD-Video
    • SACD
      • Hybrid SACD
    • DualDisc
      • 8cm CD+G
    • MiniDis
    • Blu-ray
    • HD-DVD 
    • Videotape 
      • VHS 
      • Betamax 
    • VCD 
    • CDV 
      • SVCD 
    • UMD it
    • Other 
      • Cartridge  
      • Wax Cylinder 
      • USB flash drive 
      • LaserDisc 
      • Piano roll 
      • DAT 
      • Reel-to-Reel 
      • DCC 
      • slotMusic
    • Wire recording
    • Microcassette/Minicassette
    • 4 tracks/8 tracks/multitracks recording
    • Elcaset 
    • VinylDisc  
    • SD card  
    • Gramophone record
  • Primary Type
    • Album
    • Single
    • Ep
    • Other
  • Secondary Type
    • Audiobook
    • Compilation
    • Interview
    • Live
    • Remix
    • Spoken Word
    • Soundtrack
  • Status
    • Official
    • Promotional
    • Bootleg
    • Pseudo-release
  • Number of tracks in the medium on release
    • Between
  • Number of tracks on release as a whole
    • Between
Work
  • Language
    • A user specified langauge
  • Tags
    • Electronic
    • Jazz
    • Pop
    • Classical
    • Any other user specified tag
  • Type
    • Discrete Works
    • Aggregate Works

I did not feel a strong reason as of why I should include the FreeDB category and the Place category provided by the web service since I was in doubt whether users would actually be particularly interested in those information. But I plan on discussing on that matter with the community and include them too if they suggest so.

Saturday, May 30, 2015

How the CSS for a template comes in the MusicBrainz server


After doing some background search, some lurking around the server files and getting some basic idea on how things work, I then decided to start working on the Explore page. I decided to design the basic GUI of the page first while complying to the existing coding standards of the MB server. That is when I started struggling with getting some CSS incorporated with the page I am working on.

I tried to figure out where hell the CSS for the pages come from but couldn't find any luck. Later, through a discussion on the IRC I came to know that MusicBrainz server does not have a per page CSS architecture. All the style sheets are placed in the directory musicbrainz-server/root/static/styles/. And all the style sheets are written in LESS not directly in CSS. 

Less is a dynamic style sheet language that can be considered as it lies above CSS. It provides everything CSS allows to do in a more convenient, easy to understand, clear and structured way. LESS allows writing style sheets with variables, functions,nesting etc. which would make the life of the programmer easy. At the end of the day, the LESS file will be compiled to a CSS file that will be linked to the templates in the usual manner.

So in the server, the file musicbrainz-server/root/static/common.less contains all the LESS files that are there to be linked with the templates. All those files that are imported there would be linked with each and every template in the MB server. So in a case where we need to link a style sheet with a single template page, all I have to do is put the code [%- css_manifest('style.css') -%] in that same page which will link that particular style sheet only with that particular template.

Last but not the least, when ever a new LESS file is created with some LESS code in it, for us to use it, it first needs to be compiled. Linking the file in the common.less wont do anything until the LESS file is compiled. The compilation is done by running  musicbrainz-server/script/compile_resources.pl script. Once that is run and the less file is imported in the common.less file, you are done!

Monday, May 25, 2015

Understanding Perl Template snippets used in the MusicBrainz server


While going through the files in the MB server and trying to figure out the places I need to make changes or add things to, I started feeling my lack of knowledge on Perl is starting to become a problem. So I thought of getting familiar with the basic types of syntaxes and methods used in the server with respect to the Perl language and its templates.

The first thing that bugged me was this [% %] notation. This is the way that we can embed Perl in an HTML document. The file containing these tags acts as a template which we can then provide dynamic content from another Perl script and generate dynamic HTML code. This is how it goes.

Let this be the content of a file named template.html

[% INCLUDE header %] 
    This is a test to generate dynamic content <br>  
    <a href="[% link %]">[% name %]</a>  
[% INCLUDE footer %] 

Then what we will do to demonstrate this is write a Perl script on another file that would generate HTML from the above template with the parameters provided.

#!/usr/bin/perl
# templategen.pl
use warnings;
use strict;
use Template;
$| = 1;
print "Content-type: text/htmlnn";
my $file = 'template.html';
my $vars = { 'link' => 'www.abcd.com', 'name' => 'ruchiranga', }; 
my $template = Template->new({
          INCLUDE_PATH => '/home/test/templates:/home/test/lib',
});
$template->process($file, $vars) || die $template->error();


Reviewing the above code, the lines use warnings; and use strict; tells perl to use 2 programs that catch many errors sooner than they would be caught otherwise, which makes it easier to find the root causes of the errors. The root cause might be the need for an error or validation check, and that can happen regardless or programmer skill. Having 'my' in front of each variable declaration is because of this line use strict;. As the script says, a variable named $file is made with the template file name, an array is made with the name $vars that contain the parameters to be sent to the parsing of the template. The $template variable holds an instance of the Template program which is returned by the method call Template->new(). The INCLUDE_PATH says where to look for the template. Finally the last line parses the loaded template with the given parameters.

In addition to all the template tags mentioned above many other tags exist. One such is the following

$vars = { 'names' => [ 'Anu', 'Welivita', 'Thanu', 'Kalpani' ], };

where in the template can be accessed as

[% FOREACH name = names %]
          Name is [% name %] <br>
[% END %]


which would simply iterate through those names in the given array and generate the specified HTML.


Friday, May 22, 2015

Unified Search/Browse Interface for MusicBrainz as GSoC 2015 Project


This is going to be the first of a series of blog posts that would follow on my project with MusicBrainz, developing an interface that has both the searching as well as the browsing facilities on the MB database.


It was a bit rough couple of weeks that passed by since I was quite busy with the semester end examination which ended yesterday. From now on my primary focus will be on the project and I already have started discussing with my mentor Michael Wiencek, on my proposal and the protype I built earlier prior to applying to the programme.

The prototype is available here!

Tuesday, December 23, 2014

Team Desolator - Tank Game


The intention of this blog page is to provide A to Z guidance for developing the Tank Game project which is a part of the Programming Challenge II module at Department of Computer Science and Engineering, University of Moratuwa.

The first and fore most thing to be done with the project is to develop a web page that has relevant content to the game and that can act as a portal to play the game. The grading criteria for the site would be as follows.

1. Appearance
    • Good use of color
    • Text that is easily read
    • Meaningful graphics
    • Quality photography
    • Simplicity
    • Every component of your site should work quickly and correctly. Across the spectrum, everything should work as expected, including hyperlinks, contact forms, site search, event registration, and so on.
    • Simplicity
    • Fast-loading pages
    • Minimal scroll
    • Consistent layout
    • Prominent, logical navigation
    • Descriptive link text

2. Content
    • Clearly label topics and break your text up into small paragraphs.

3. Functionality
4. Website Usability

The decision on the appearance of the page is up to you. Obviously it would make much sense if images of tanks are used in the site. It would be better have designed a logo for your team so that you can put it up in the site. And the structure or the template you use for the site should match with the theme that runs across the site. Fancy templates would harm the serious look of the site which usually does not match for a gaming site. As I feel,  a theme based on black and its shades would look more real.

Minimal scroll is also something which most sites do not have. If you look at analytics on famous sites that have much scrolling, less not more 50% of the site viewers would scroll and see the bottom of the page. That is simple because it is frustrating for a viewer to keep scrolling down and down. So better keep the content of the site small and simple.

The next thing we should worry about it what the hell should we put on this site. Well that was a pretty hard thing for us too to think of somethings that we can put in the site. These are the ones we came up with eventually:
On the menu bar

    • Home
    • About
    • Play Now
    • Gallery
    • Contact Us 
On the footer
    • A link to a youtube video of a Tank game play
    • A link to this blog
    • A link to the Wiki page with game instructions and everything
    • Some links related to Help category
    • Links to our social site pages
This is our progress up to now. Hope to keep this page updated as we proceed.